15Jun
“What gear should I buy to produce my own music?”
It stands to sense that this is one of the most common questions that I get asked by new students – assembling your first home studio can be a daunting task if you have no previous experience in a recording studio.
There are already a tonne of guides out there that give a multitude of options for various budgets. That’s all nice and well, but I feel that throwing a handful of options at an inexperienced beginner will simply add to their confusion. I’m going to recommend one item per category, with the exception of monitors, for which there isn’t a ‘one-size-fits-all’ solution. More on that later…
If you want to get up and running with minimal hassle, you can simply buy everything I’m going to recommend in this post and you will have a working home studio at your disposal (proving you read the instructions and set everything up correctly)!
Budget gear, professional sound
While it can be tempting to buy so-called ‘top of the range’ recording gear in the hope that it will somehow improve your recordings, you really don’t need to spend a fortune to achieve professional results. The quality of entry-level and mid-range gear has never been better and that is what I will be focussing on in this post. I recommend all of this gear to my own students.
Of course, everyone’s needs are different, so if you have a particular budget in mind and need some help picking the right gear, we offer a service for that very purpose.
This guide assumes that you already have a PC/Mac and a DAW – Most modern home computers are capable of running DAW software without any problems. If you don’t have a DAW yet, check out the options or book a taster lesson, where you will be able to try out any of the DAWs that we cover for yourself.
I’ve also simplified some terms and concepts to make this guide more accessible to beginners. Now, let’s get started!
1) Audio interface
In order to record any audio source, you’ll need a way to send an audio signal through your computer and into your DAW. Most computers come with a built-in soundcard, which essentially performs this function, but the quality of most of these components isn’t anywhere near good enough for studio recordings.
An audio interface is basically an advanced soundcard that connects via USB, Thunderbolt or FireWire. These devices allow you to plug microphones and instruments that connect with jack plugs (such as guitars and keyboards) into your computer. Most audio interfaces come with a headphone socket, monitor outputs and basic volume controls. FireWire ports are less common nowadays and Thunderbolt devices can be quite expensive, so it’s a safe bet to go with an audio interface that connects via USB.
My favourite entry-level audio interface is the Audient iD4. iD4 delivers the audio performance of a large format console in a portable desktop package enabling you to record your vocals and guitar simultaneously. Providing one renowned Audient console mic pre, class-leading converter technology, dual headphone outputs, console style monitor control, JFET D.I and our virtual scroll wheel technology 'ScrollControl', iD4 is a professional but affordable solution for your home studio or for when you’re on the road.

2) Monitors
Don’t get monitors confused with your computer display screen. When we talk about monitors in music production, we mean the speakers that allow you to ‘monitor’ your mix. Your laptop speakers won’t do the job, as they are too small to accurately reproduce a full frequency range for mixing music. You will need something a bit more substantial and the monitors you choose will depend on how much desk space you have available, as well as the size of your room.
The Eris series from PreSonus provides solid build quality and professional features at a very affordable price. I’m going to recommend three different models from this range. You should pick the one that is most appropriate for the amount of space you have to work with.
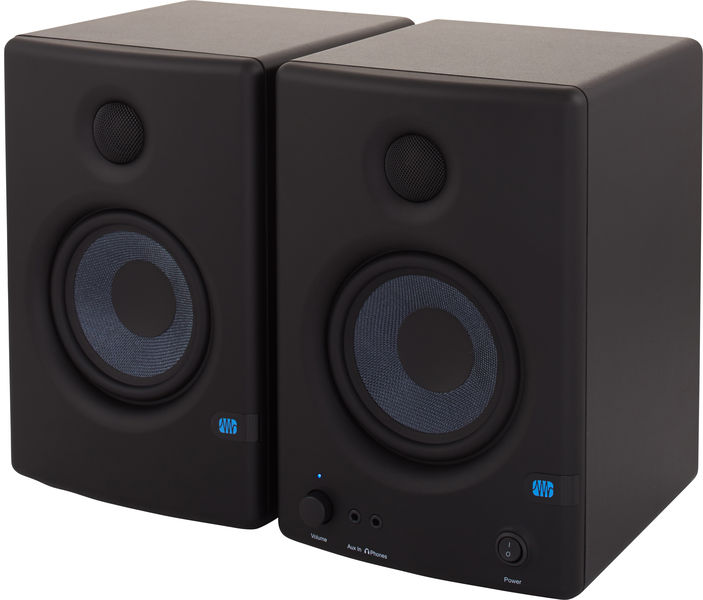
PreSonus Eris E4.5
If you have a medium to large-sized room, with a large desk (or enough room to put up speaker stands), go for the largest monitors in the range, the Eris E8XTs.
If desk space isn’t an issue, but you have a small to medium-sized room, a pair of Eris E5XT monitors will be your best bet.
If you have a small room AND a small desk, consider picking up a set of smaller Eris 4.5s (pictured above). Although compact in size, they pack a lot of punch and are up to the task of most mixing jobs.
All three models come with acoustic adjustment controls to help fine-tune your monitors for your mixing environment. Industry professionals will pay thousands of pounds to acoustically treat their studios. This just isn’t feasible for the home or project studio user. In short, the ‘Acoustic Tuning’ controls on the Eris monitors will help you achieve better quality mixes in a home studio without breaking the bank.
3) MIDI keyboard
Even if you don’t play piano or another keyboard instrument, a good MIDI controller keyboard will help you make music much faster. It takes hardly any time at all to learn a few basic chords and you can even play in drum beats using a keyboard. Without a MIDI keyboard, you will be forced to draw notes in manually using your mouse or trackpad. This can be extremely time-consuming and often results in artificial-sounding instrumental parts.
Unless you plan on transporting your studio gear around on a regular basis, you should get a 49-key MIDI controller keyboard with full-sized keys. 49 keys gives you 4 octaves to play with, allowing you enough room to play chords and a bassline at the same time. This speeds up the music-making process and makes it much more enjoyable.
The Acorn Masterkey 49 is a great no-frills USB MIDI keyboard. It has all the essential functions that you will need and is extremely simple to set up – just plug in and play. It even comes with a free copy of Studio One 3 Artist – worth £129 alone!
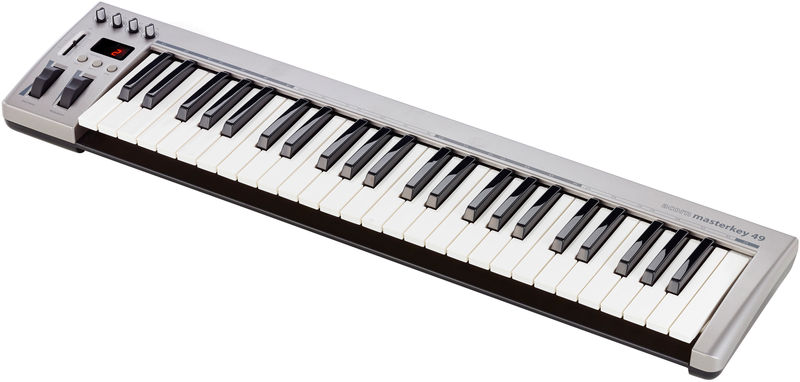
Acorn Masterkey 49
4) Microphone
Even if you plan to make music entirely ‘in the box’, you will need a microphone at some point, be it to record a vocalist, an acoustic guitar, a violin or something else that you don’t already have as a virtual instrument in your DAW.
There are three main types of microphone – dynamic, condenser and ribbon. I’m going to assume that if you plan on recording electric guitar, you will be using guitar amp simulator software (basic amp simulators are included with most DAWs). It’s also more likely that you will be programming drums using MIDI in your home studio, rather than trying to cram a whole acoustic drum kit and an array of microphones into your room. Therefore, you can forget about dynamic and ribbon microphones for now and concentrate on getting yourself a nice condenser microphone that will serve you well for a multitude of recording tasks where only one microphone is required.
My pick of the budget condenser mics is the SE Electronics X1 A. It’s a ruggedly-constructed large diaphragm microphone, with a 20dB pad switch (to help you record loud sounds without distorting the signal) and a low-cut filter to eliminate rumbling sounds, such as outdoor traffic and footsteps. You can pick one up for an unbelievably low price and the sound quality rivals that of microphones over twice the cost – I can’t recommend this microphone highly enough!
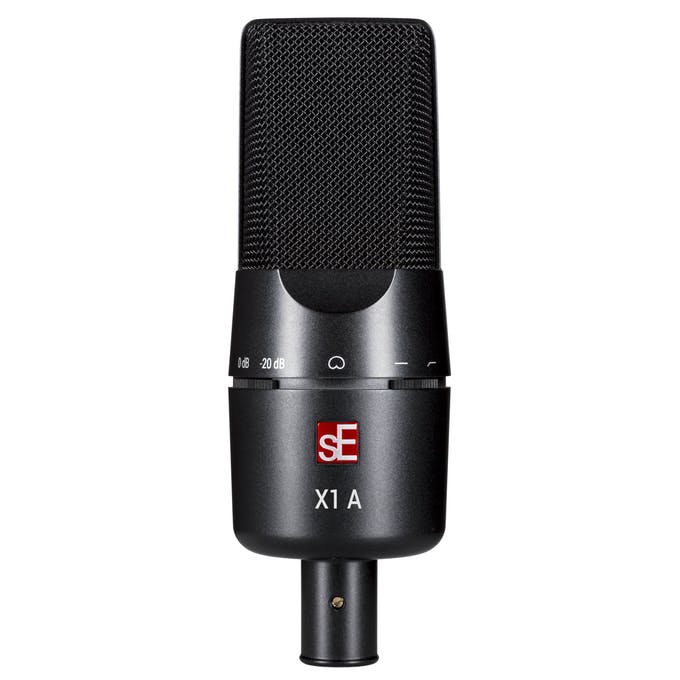
SE Electronics X1 A
5) Headphones
It’s always best to mix music on monitors, but you will need a good pair of headphones for those times when you need to record audio. You do not want to risk the signal coming back through your monitors and creating a feedback loop when you are trying to record. There also comes a certain point in the evening when you’re going to want to turn your monitors off – think of your neighbours!
Audio-Techinca‘s entry-level ATH-M20X headphones have everything you need for under R1500 (at the time of publishing). With a comfortable fit and professional specifications, including a closed-back design to minimise sound leakage and a full 15-20,000 Hz frequency response, they offer serious value for money.
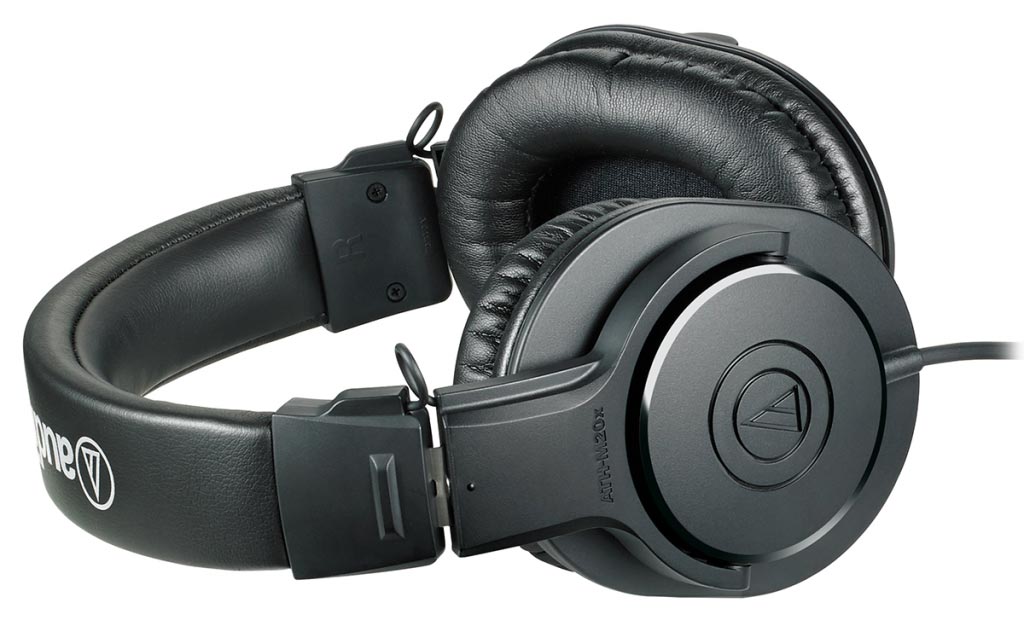
Audio-Technica ATH-M20X
6) Microphone stand
You will need a good, sturdy microphone stand to hold your microphone firmly in place with minimal wobble. The Millenium MS-2003 is by far and away the best budget stand out there. Available exclusively through Thomann (who are based in Germany, but offer low prices and UK shipping), it has an adjustable height of 105-170cm and comes with a 75cm boom arm, making it easy to position for most recording tasks.
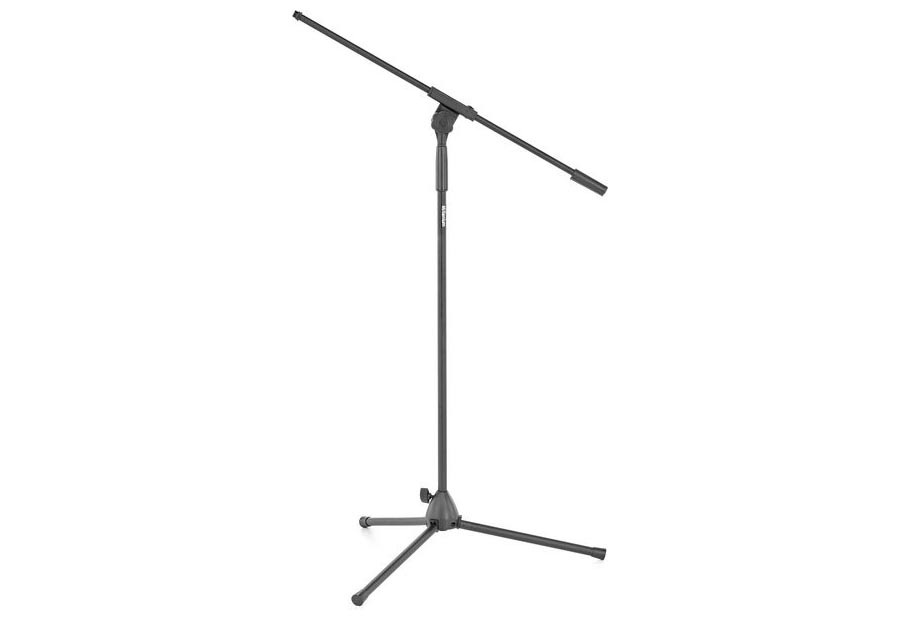
Millenium MS-2003
7) Cables
There’s nothing more frustrating than buying all the gear and realising that you don’t have the right cables to connect it up. While most of the items above come with the required leads, there are a few extras that you will need.
At the very least, you will need one XLR cable for your microphone and two balanced jack cables to connect your monitors to your audio interface.
Although not known for the quality of their instruments, Stagg make an excellent range of affordable cables, which are durable enough for regular studio use.
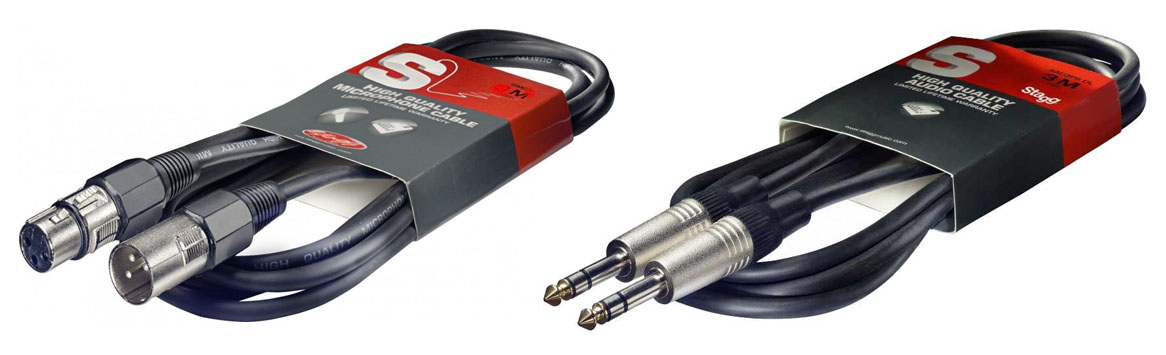
Stagg XLR and balanced jack cables
8) Further considerations (optional)
If you’ve purchased everything above this point on the list, congratulations – you now have a fully equipped home studio! There are, however, a few other things that can make a real difference to the quality of your recordings.
Consider buying a pop shield to place in front of your microphone. A pop shield helps to prevent loud, unwanted ‘p’ sounds on vocal tracks. These noises are very hard to remove after you’ve recorded your vocals, so it’s best to eliminate the problem at the source.
The SE Electronics Metal Pop Shield is a good mid-range option, with a flexible goose neck attachment for easy positioning. Cheaper pop shields tend to be smaller and harder to position correctly in front of a large microphone.
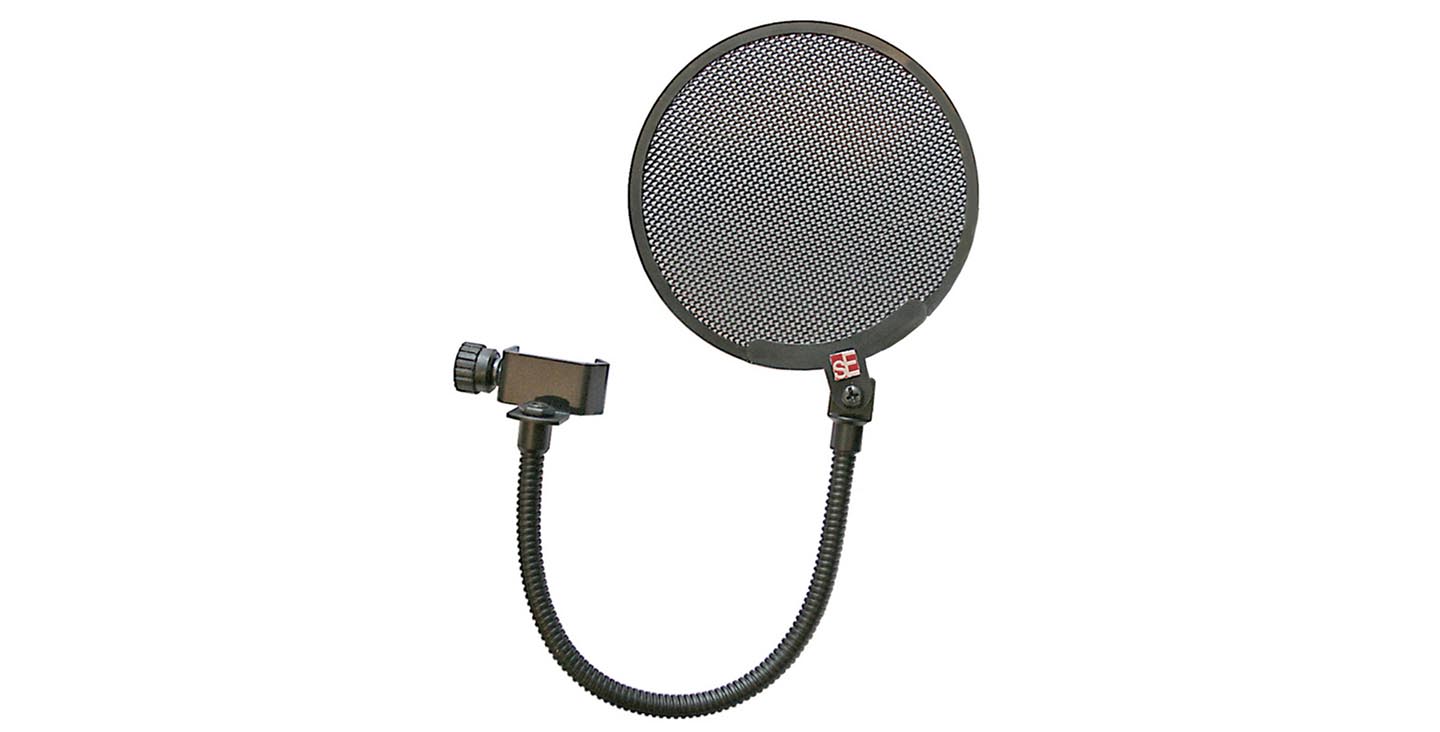
SE Electronics Metal Pop Shield
In professional studio ‘live’ rooms (where musicians play while recording), walls are acoustically treated to stop sounds bouncing back into the microphones (what you might typically refer to as ‘echo’). Most home recording environments do not benefit from this luxury, but there is a cost-effective solution. A reflection filter will help to minimise room noise. It sits round the back of your microphone and forms a curved surface to stop sound escaping behind the mic and bouncing off any walls or other flat surfaces.
SE Electronics once again offer the best value. The RF-X Reflexion Filter is a lightweight solution that will fit on almost any microphone stand without toppling it over (a problem that dogs some of the more expensive, heavier models). SE Electronics invented the reflection filter, so you can relax in the knowledge that you’re using quality gear from the industry leader, despite the modest price tag.

SE Electronics RF-X Reflexion Filter
Last, but not least, you should think about picking up a set of monitor isolation pads. Your monitors’ low-end can cause your desk to vibrate, especially at loud volumes. This will make it seem like your tracks are more bass-heavy than they really are – forcing you to turn down any bass instruments in your project, leaving you with thin-sounding mixes that don’t work well on other speakers.
Universal Acoustics make the cost-effective Vibro Pads Lite. You get four pads in a set, with adjustable tilt on each pad for angling your monitors. They can be spaced out to accommodate larger monitors, or pushed together to support smaller models.
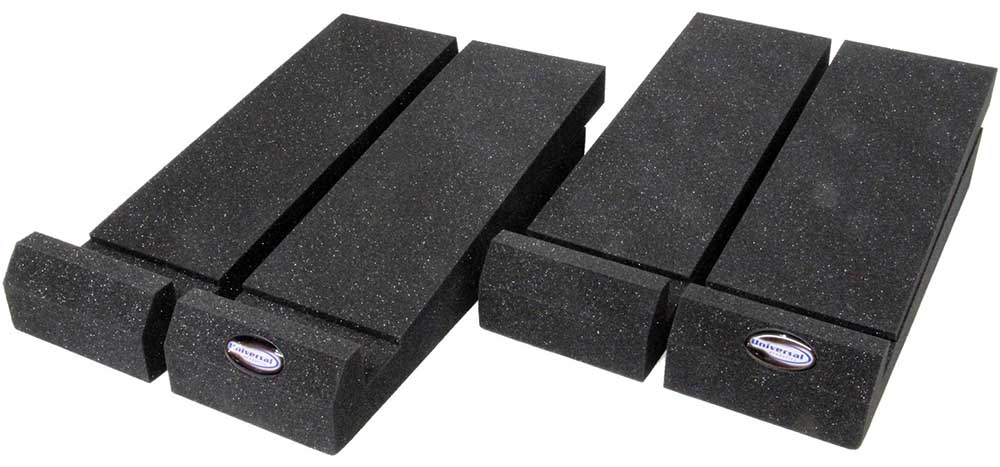
Universal Acoustics Vibro-Pads Lite
Comments